Hey there! It’s Judy V here with a wreath card created for my first DT project for this month for CutCardStock.
I was perusing Pinterest and saw several cards of this design and decided to give one a try.
Materials
Kraft Chipboard .022, DCS Discount Card Stock: Natural Twine Kraft Card Stock, Royal Sundance FELT Brilliant White , DCS Discount Card Stock: Pearlized Textured Fruit Punch Pink
Die’sire (Crafter’s Companion) “Floral Easel” die set, Die’sire (Crafter’s Companion) “Trellis” die set, Peony Collection Corner Bloom (Natures Garden, Crafter’s Companion) stamp & die set
Peony Collection 12 x 12 paper pad, Spectrum Noir Markers & Finesse Ink Pad, Martha Stewart Butterfly Punch, ribbon, pearls, wet glue, tear tape, red line tape, acetate.
Florals and Wreath Form
The corner flower stamp used was stamped 5 times on Royal Sundance FELT Brilliant White card stock, colored and die cut. I cut the wreath base out of the Kraft Chipboard using 2 scalloped dies forming a frame, 4 times.
3 of the frames were glued together with wet glue to give the wreath some stability. Rather than lining the pieces up perfectly, I staggered to give a twined effect. A strip of acetate was cut and adhered to the back of the wreath to hold my sentiment piece, which is a die cut from the paper pad I used. Red line tape was used to adhere these pieces. The 4th frame die cut will be glued to the back to cover the acetate.
Card Base
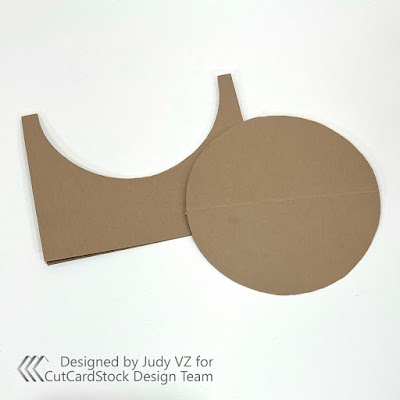
I made the card base next. An 8 1/2 x 11 inch piece of Natural Twine Kraft Card Stock, was trimmed to 6 x 9 inches and folded in half. A 5 1/4 inch circle was cut from the center.
Instead of leaving the card base bare, I decided to add patterned paper. The patterned paper measures approximately 5 3/4 x 4 inches. This piece was trimmed with a half circle along the upper edge. A border was die cut out of Pearlized Textured Fruit Punch Pink card stock. Ribbon was laced through.
Note that the base size can be adapted, smaller or larger, depending on the size of your “wreath” form. The largest scalloped die I used measures 5 1/2 inches.
Adding Wreath and Flowers
The wreath and flower pieces were adhered with wet glue.
Embellishments
Embellishemnts are added to complete. I used a 3 loop bow, hand punched butterflies and pearls.
I hope you have enjoyed my Wreath Card project as much as I enjoyed creating it.
As always, we would love for you to connect with us over on the CutCardStock Facebook Page and out new Facebook Group Creating with Card Stock.


This is fabulous, Judy! Thanks for the tutorial! As soon as I get all my comment done, I am going to create a project using your inspiration! Thanks so much for another show-stopping submission to our challenge.
ReplyDeleteThanks for stopping by A Place to Start !
Hugz,
Chana Malkah, Owner
This is beautiful and thank you for sharing the tutorial. Thank you for joining the Cut it Up Embellishment challenge.
ReplyDeleteHugs,
Larelyn (CIU owner)
It's a really pretty design and colour palette, the shape is so effective and one I just might have to try, many thanks for sharing with is at Stamping Sensations challenge.
ReplyDeleteB x
a really pretty card. Thank you for joining us at Creations in Pink. Marlene DT
ReplyDeleteWhile pink usually isn't my color, I love this, Judy. Thanks for the tutorial, too! Thanks for joining us at 613 Avenue Create. I hope we see you on the front porch again soon!
ReplyDeleteHugs, Em
613 Avenue Create DT
Creative Em my blog
A lovely card and a great design.
ReplyDeleteThanks for sharing with us at Stamping Sensations.
Avril x