
Hey there! Today I'm sharing my latest CutCardStock DT project.
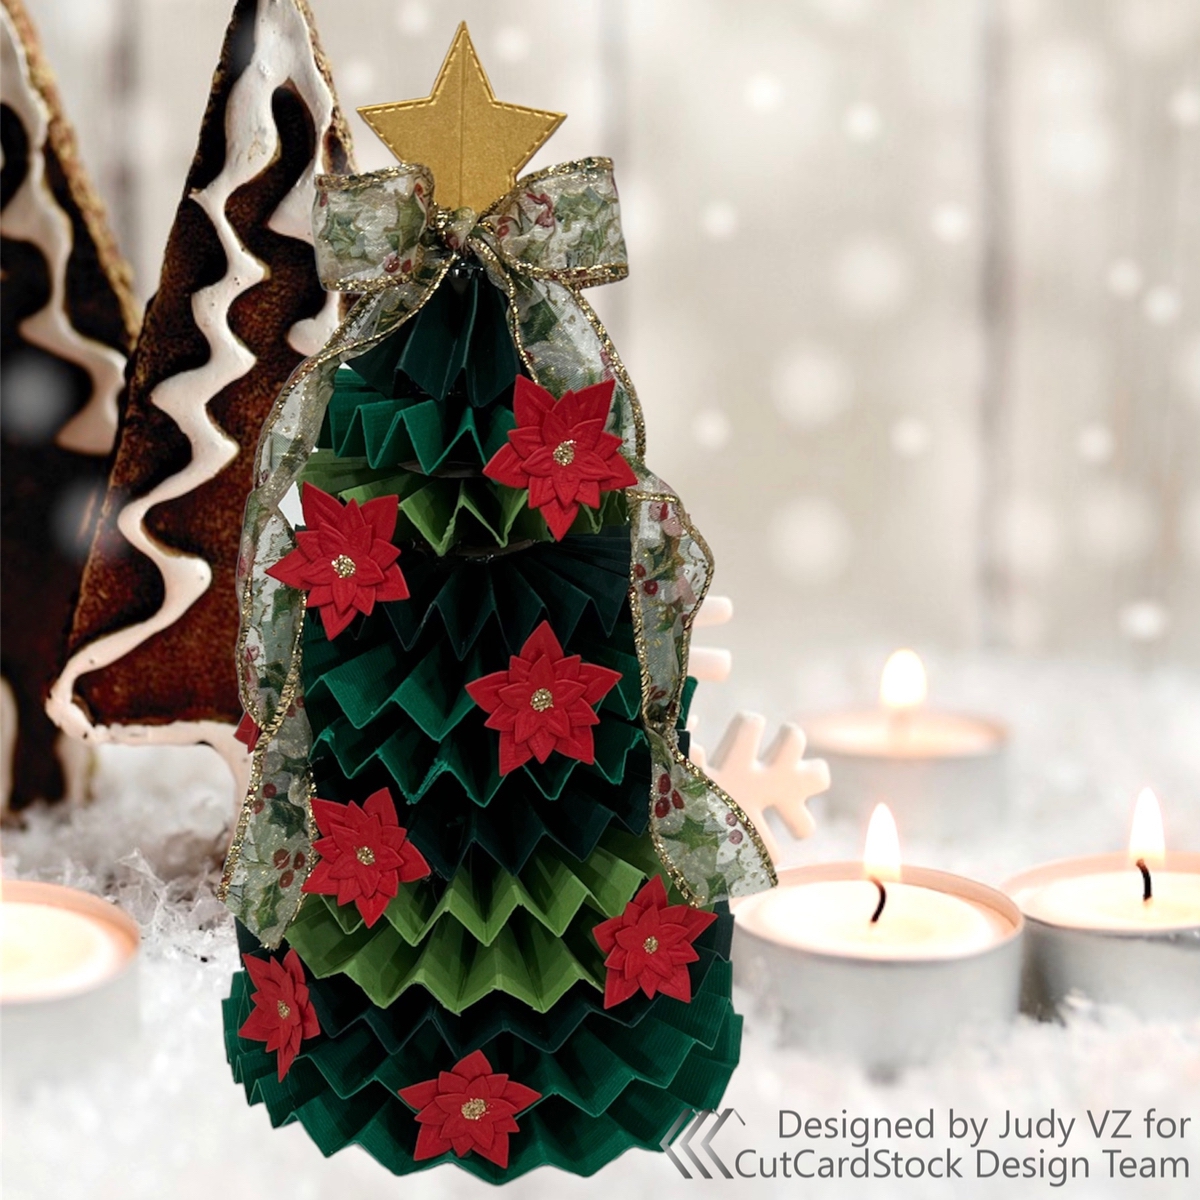
I have created a Rosette Christmas Tree. Grouping several of these together would make a great holiday table scape.

Materials
DCS Discount Card Stock: Canvas Textured Bonsai Green, Pop Tone GUM DROP GREEN Discount Card Stock, Royal Sundance Linen 80 lb EMERALD Card Stock, DCS Discount Card Stock: Canvas Textured Habanero Red Card Stock, DCS Discount Card Stock: Natural Twine Kraft Card Stock, Stardream Metallic GOLD CardstockSmall Circle Dies, Small Star Die, Mini Poinsetttia Dies, Hot Glue, Hot Glue Gun, Glitter Glue, Wet Glue, Ribbon
Rosettes
11 Rosettes were made by cutting 2 strips of card stock for each scoring every 1/2 inch. Accordian fold each strip and adhere the 2 strips together and end to end to form a circle.
To form the rosettes scrunch the accordion folded circles together toward the center and attach with a die cut circle on both sides with hot glue.
Sizes of card stock strips used from largest to smallest:
2 1/2 x 11 inches (2) for 1 rosette
2 1/4 x 11 inches (6) for 3 rosettes
2 x 11 inches (2) 1 rosette
1 3/4 x 11 inches (6) 3 rosettes
1 1/2 x 11 inches (4) 2 rosettes
1 1/4 x 11 inches (2) 1 rosette

Tree Construction
Start with the largest rosette, which will be the base, and hot glue the next size to the center. Continue until all 11 rosettes are stacked.

You can call this finished if desired, but, I added another layer to the top. This piece was done with a 1 x 11 inch strip of card stock scored every 1/2 inch and adhered to form a circle.
I brought the inside edges of the circle together and hot glued to form a triangular shape as the tree top.
I adhered an inch sized circle to the top to cover the hot glue edges.
using a small star die I cut 3 stars and glued together to form a 3 D star for the topper.
The tree top and topper were added.

Decorating
A piece of ribbon was cut. A bow was formed and added to the tree top.
3 mini poinsettia dies were used to cut flowers. These were layered with wet glue and glitter glue was added to flower centers.

Finishing
The poinsettias were adhered to the tree to complete.I hope you have enjoyed my Rosette Christmas Tree project.
As always, we would love for you to connect with us over on the CutCardStock Facebook Page and out new Facebook Group Creating with Card Stock.
************************************************
I'm linking up to:
Sisterhood of Crafters - Anything Christmas or Winter
The Crafter's Cafe Challenge - Use Dies and/or Punches
Crafts Galore Encore Challenges - ATG
The Corrosive Challenge - ATG
Peace on Earth Christmas Challenge - Anything Christmas Goes
This is a lovely project and makes a beautiful centre piece for a table or stand alone ornament. Thank you for joining us at the Crafts Galore Encore Challenge.
ReplyDeleteLorraine
Beautiful! Thank you for sharing with us at The Sisterhood of Crafters.
ReplyDeleteWow! I admire your patience to make all those rosettes. Yes, a grouping of them would look lovely! Thanks so much for joining us at Peace on Earth!
ReplyDelete