
I love decorating for the holidays, from setting up the tree, adding a wreath to the door and other little touches throughout the home.
Hey! Today I'm sharing a project created for CutCardStock. If you like adding those little touches I mentioned above, this holiday decor piece is something you can put together with some pretty card stock and some die cutting.

For this project I used an inexpensive wood frame, Basis RED Cardstock, Basis WHITE 80lb Cardstock, Basis GREEN Cardstock Stardream Metallic FAIRWAY (green Card Stock, DCS Red GLITTER Heavyweight 12×12 Discount Card Stock , Silk GLITTER Opulent Opal 12×12 Card Stock, various dies from Crafter’s Companion and Spellbinders glitter, wet glue and double sided tape adhesive.

I chose one of the papers from the 6×6 paper pad to use as the focal. It was taped to the front of the frame over the opening. Turning the frame over to the backside, I traced the opening on the paper, Using a metal ruler and craft knife, I cut around the tracing. The outer portion of the 6×6 is saved to use on the frame front.


My die cutting was done next.
Four frames were cut for layering over the opening. The other die cuts will be for embellishing.
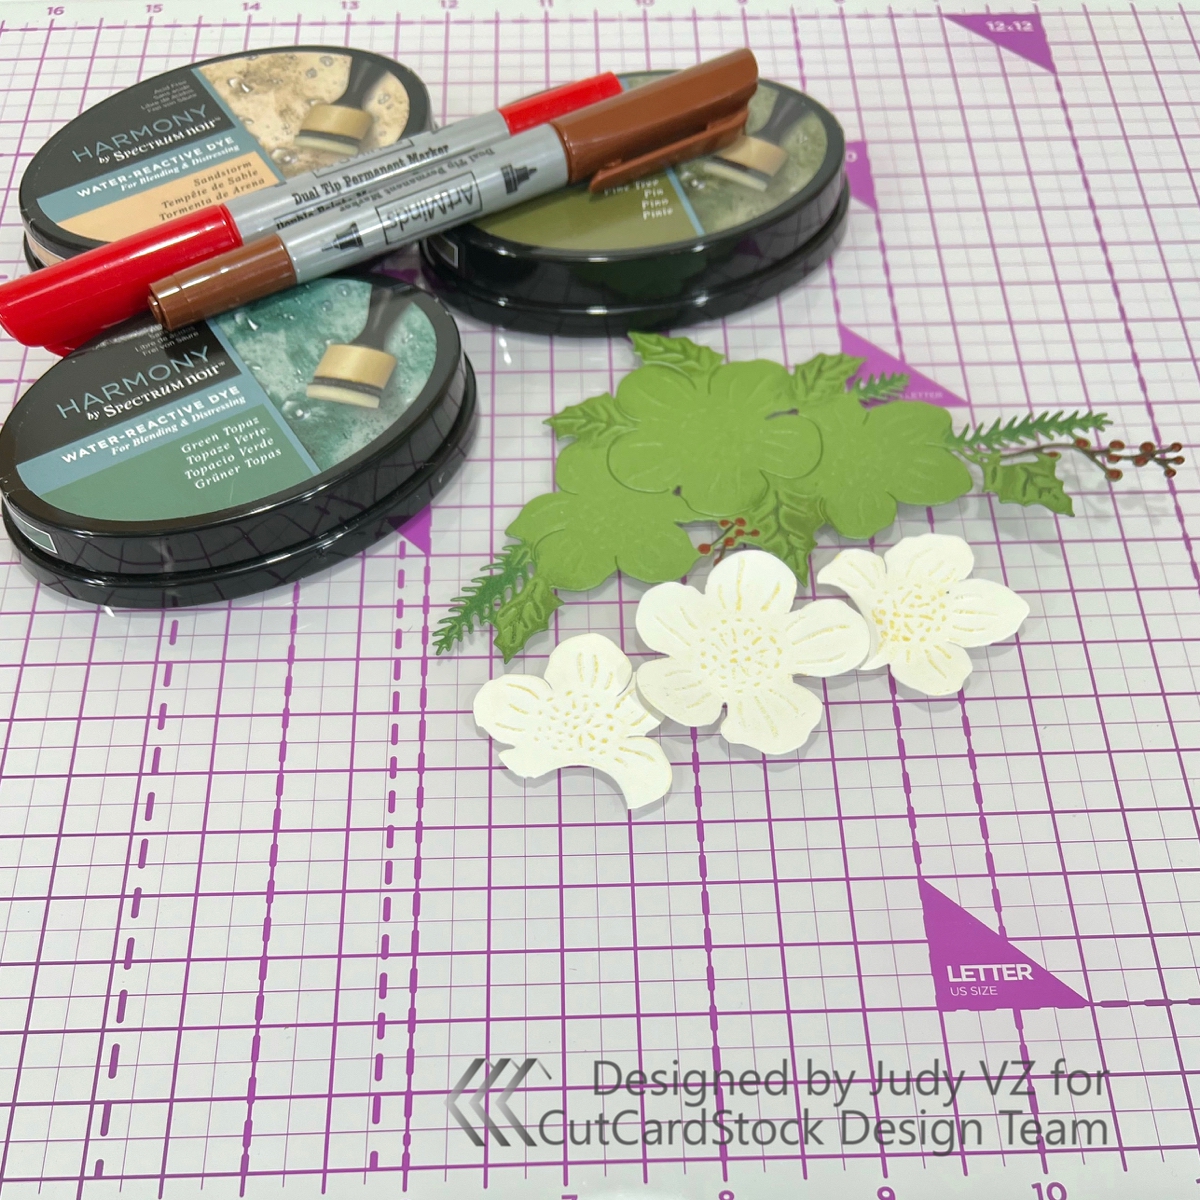
I cut 2 of the floral, 3 of the title and 3 reindeer for layering. Gold glitter was added to the reindeer antlers.


A little color was added to the embossed areas of the floral die cuts. I used ink pads and my finger to do this. The berries were colored with markers. I later decided to add some gold glitter to the white flowers.
The frame was left unfinished, although you could paint if desired. Some glitter was added to the focal image. Frames were added.


_____________________________________________________


So many pretty details. One can see all the love that went into your project.
ReplyDeleteI like what you did with a piece of wood and some paper ! Amazing project and perfect for our "Winter" Challenge @ Little Red Wagon. Thanks for joining us and i hope to see you back again soon.
ReplyDeleteImke ~ MY CRAFTY PLACE
Gorgeous project with those dies and frame! Thanks for sharing at Die Cut Divas!!
ReplyDeleteGorgeous project!! Thanks for playing with this November at Die Cut Divas.
ReplyDeleteFabulous design love it TFS over at POE this time
ReplyDeleteElaine DT x
Judy your project is stunning! Thank you for joining us at INkspirational~
ReplyDeleteWell thought out and thank you for the tutorial. Fantastic card. So glad you joined us at Die Cut Divas for our November "Anything Goes" challenge.
ReplyDeleteAmazing project! I love how you used the winter scene patterned paper on your project. So clever! The flowers and greenery in the upper right corner is just stunning. Thanks for joining us at Die Cut Divas.
ReplyDeletesue n.