Hey there!
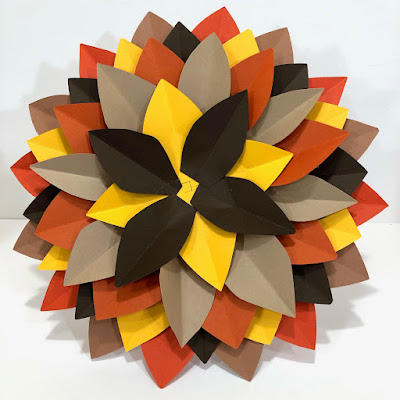
I am over on the CutCardStock Creative Blog sharing a fall wreath project.
Have you have ever made a paper cone or dahlia wreath?
This one is put together in much the same way.
I just used leaf or petal shaped pieces of card stock instead of rolling squares into cones.
The card stocks used are:
A circle cut from a cardboard box is used as the wreath base.
Mine measures approximately 9 3/4 inches across.
You can adapt to any size desired.
I sectioned the cardboard into 8 with pencil lines.
Two circles are drawn to help positioning the first 2 rows of leaves.
The first circle is about 2 inches in from the edge, with the 2nd in another 1/2 inch.
Next I cut the leaves free handed.
Pieces of card stock approximately 3 3/4 x 4 1/4 inches were folded and
cut across the fold in a curved shape.
I cut 16 leaves for rows 1 - 3 and 4 for each of the 4th and 5th rows.
Being that the center is not very pretty I decided to add a rosette. You can use anything you like such as a bow, pumpkins, a flower or flowers, etc to complete.
My rosette was made by cutting 3 pieces of card stock 8 1/2 x 1 1/2 inches.
Score every 1/2 inch along the long side and accordion fold.
The 3 pieces are glued together to form a circle.
Bring the inner edges together and glue to a 1 inch circle on both sides.
I die cut a decorative circle for the rosette base and glued together.
Adhere the rosette piece or whatever you decide to use to the wreath center.
A ribbon can be attached to the backside of the wreath for hanging.
The finished wreath measures a little more than 13 inches across.
This size is easily adaptable by increasing the size of the base and adding more rows.
As always, I hope I've provided some crafty inspiration for you!
Maybe you will create your own fall wreath!
Until next time, Happy Crafting!
i'm linking up to:
Through the Purple Haze - ATG
Creative Moments - ATG
A Bit More Time to Craft - ATG


