Thursday, June 13, 2024

Fairy Album/Journal

 Hi there!
Today I'm sharing my final project as a Creative Guest Team Member for Clear Scraps


I pulled out the Chipboard 5x7 Tab Album and Heart Mini Pallet Shape. The Album comes with 4 chipboard pages and 2 pre-drilled holes. Heart Mini Pallet measures approximately 3.75 x 3.75 inches, is made from 1/8 inch birch wood and is hand assembled. It can be used as a great addition to any craft project, is unfinished and ready to decorate as you please.


So, what should I do with these products? Well, I remembered I had purchased some digital Garden Fairy Clip Art on Etsy from ThursdayPrintsMY a while back and decided a little fairy themed album and/or journal would be a fun project to create! 


I pulled out a 12x12 inch paper pad to use and chose 7 fairies, that I thought coordinated well with the patterned papers, and printed.


The fairy images were fussy cut.


Next I painted the 4 chipboard album pages and the heart with a light blue metallic acrylic paint. I’ll be covering the chipboard pages with paper so I only painted around the outside edges of both sides. 


Cover each side of the chipboard album pages with the papers measuring 4 1/2x6 3/4 inches. I lined my papers up on the chipboard and marked where the holes are and punched. (later I ended up punching a total of 6 holes on each page with my Cinch machine)


The papers I used for the front and back covers are mostly white with some foiling, so I added a little ink for some color with a finger dauber.


I decided to add some more pages to the album. Magical Garden Clip Art from CosmicMeta on Etsy was downloaded and printed on white card stock and trimmed to 4 1/2x6 3/4 inches.


Holes were punched.


Wanting to add some pockets, I cut 6 pieces of patterned paper 4 1/2 inches wide and 3 1/2 inches long on one side and 1 3/4 inches long on the other in order to form a diagonal piece.These will be adhered to the bottom and outside edges of the pages.   


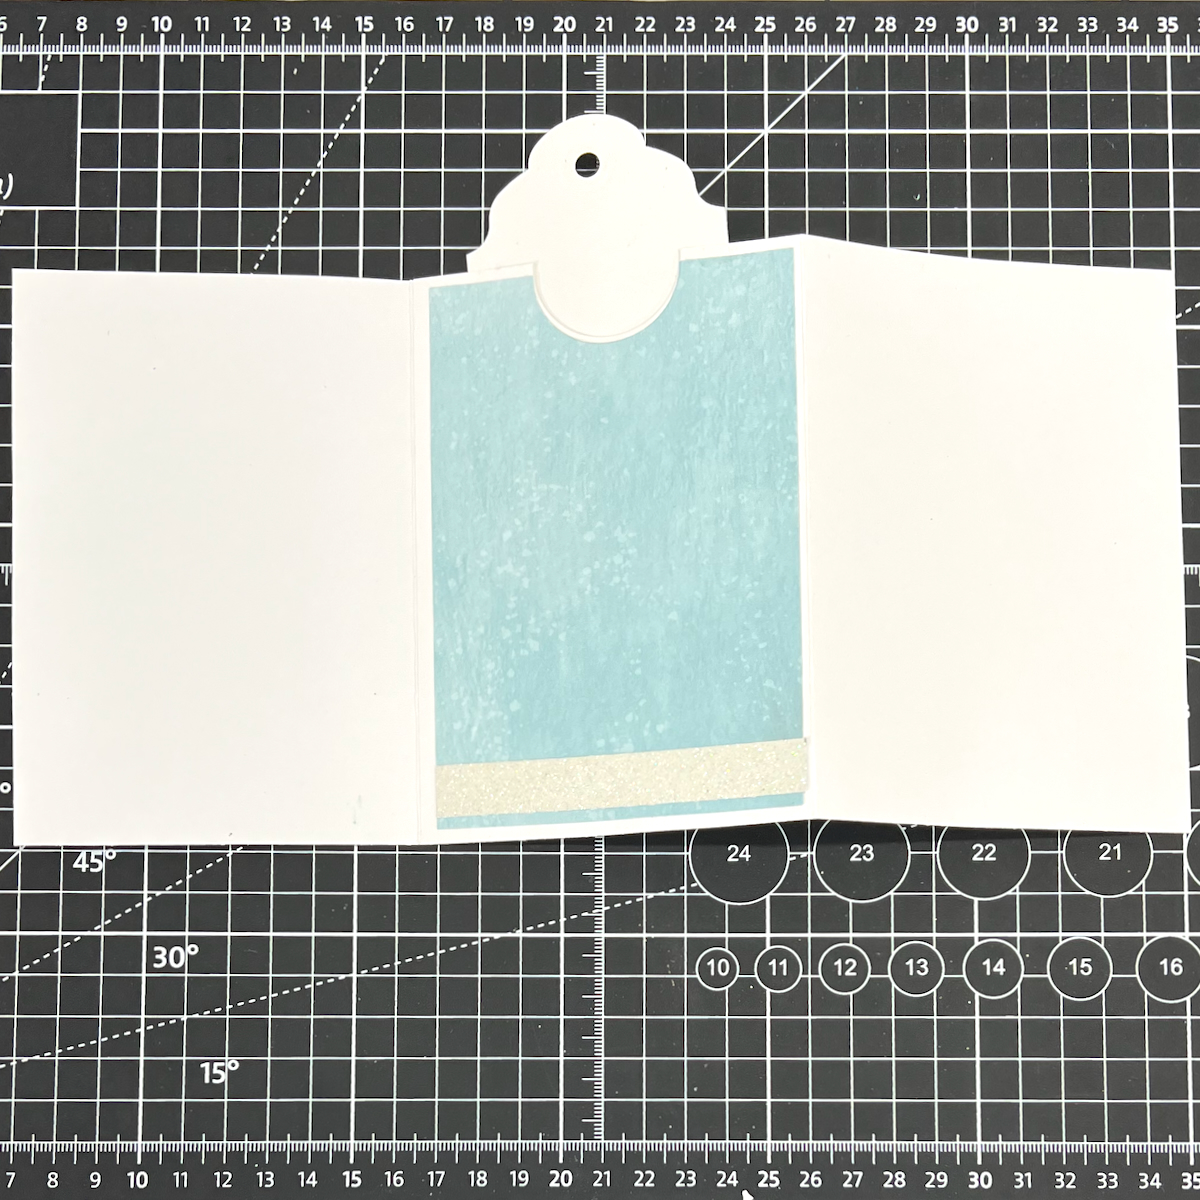
I also decided to add some trifold pieces to the inside front and back covers. 


These were formed with 2 pieces of white card stock cut to 7 1/2 x 5 1/2 inches. Score at 

3 3/4 inches along the 7 1/2 inch side of both pieces. Adhere 1 side of each together along the sides and bottom, leaving the top open to form a pocket for a tag. Fold with a mountain fold on one side and valley fold on the other. I notched the center panel with a round die or you could use a circle punch. This makes it easy to insert and remove my tags which 

measure 2 1/2 x 4 1/2 inches. 


Decorate the chipboard pages and printed pages as desired. 


I die cut frames and word titles and pulled out an array of stickers and bling. A little bit of foiling was done with transfers and I added some wavy borders on the plain pages with a glitter gel pen.


Binder rings are used to hold the album together. I added some ribbon and a charm.


Some journaling cards were inserted in the pockets.


Here are photos of the completed pages.


Thanks so much for taking the time to check out my project!


You can find more Clear Scraps inspiration 

by following on social media


Clear Scraps Blog

Clear Scraps Facebook

Clear Scraps Instagram

______________________________________________________
Linking up to:
A Place to Start - ATG w/Anything but a Card Twist
Mini Album Mania - Any Type Mini Album
613 Avenue Create - ATG option
HQFCB - ATG Fantasy / Focus Fairy
_____________________________________________
Challenge Recognition


Wednesday, June 12, 2024

4th of July Card

Summer is heating up and soon 4th of July celebrations will be upon us! 
Hey there, today I'm here and on the CutCardStock Blog with a
 4th of July Card created for CutCardStock

This card was fun creating with red, white and blue cardstock which 
happens to be in this month’s Monthly Specials
Be sure to check it out!


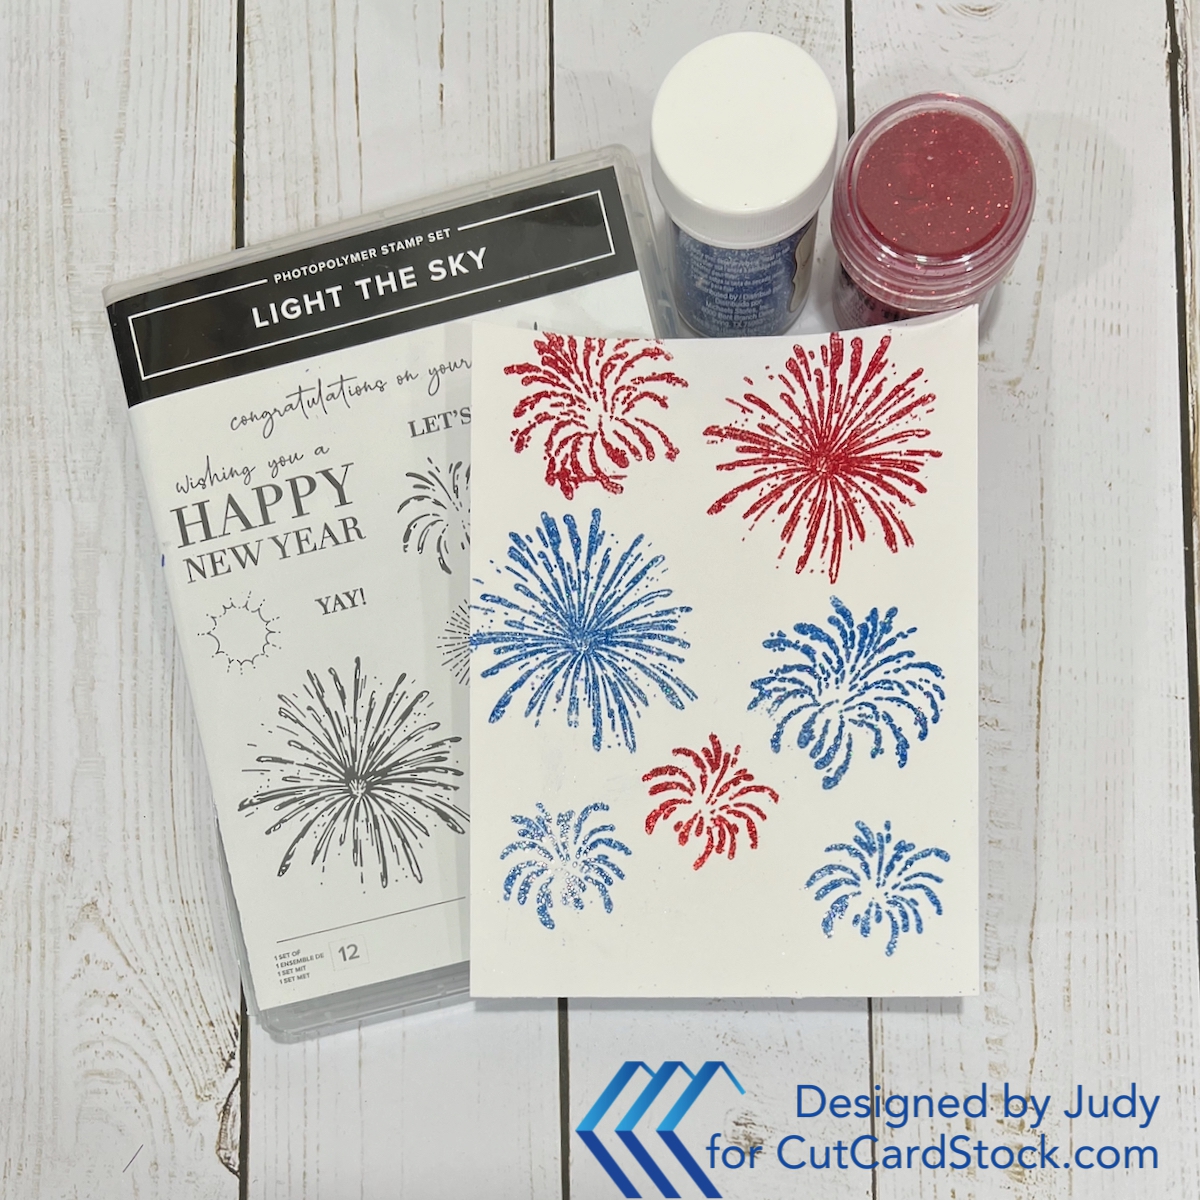
I have a stamp set from Stampin’ Up (thank you Debbie Mageed) that I’ve been wanting to use and it’s perfect for this project.


My card is a double z-fold style. So, let’s start with the card base. It measures 5″ x 6-1/2″ which is usually my go-to card size.


I used Lessebo NAVY BLUE Cardstock. Cut to 6-1/2″ x 10″ and score at 2-1/2″ and 5″ on the long side. Fold as usual at 5″ and then fold to the left on the 2-1/2″ inch” score line.


Next, cut the panels to cover the base. 


You’ll need two 2-1/4″ x 6-1/4″ panels and one 4-3/4″ x 6-1/4″ piece for matting the next panels cut. I used Lessebo DAWN Cardstock


Similarly, cut two 2-1/8″ x 6-1/8″ panels and 4-5/8″ x 6″ piece.

 I used Cougar White Smooth Cardstock.


I did my stamping and heat embossing on the largest white panel using
 Versamark ink and red and blue glittered embossing powders.


Mat the white panels with the red panels.


For the second z-fold piece, I cut three borders with a border punch. 
As before, I used the same red, white and blue cardstock.


Layer these 10″ long borders together. I cut the blue border wider and 
added the white and red borders on top.


Now we’re ready to assemble the card. Firstly, adhere the panel and border pieces to the card base.


Secondly, you’ll score the border piece at 5″ and 7-1/2″ and adhere it as seen in the photo below.


Do some die cutting for the embellishment pieces. I also stamped and embossed two smaller firework images and fussy cut. Additionally, layer the “4th of July” piece and add to a thick piece of acetate. 


Cut some of the embellishment pieces from Blast Off Blue Cardstock. Cut the other embellishments from the same red, white and blue used throughout the project.


Add the embellishment pieces to the card, and you’re done!


Thanks so much for taking the time to check out my 4th of July Card project!

As always, we would love for you to connect with us over on the CutCardStock Facebook Page and the Facebook Group Creating with Card Stock for more inspiration.

And even more inspiration can be found on the CutCardStock Blog.

************************************************
I'm linking up to:
A Place to Start - ATG option
Classic Design Challenge - ATG w/Masculine twist
Creative Creases - ATG with a Fun Fold
613 Avenue Create - ATG w/For the Guys twist
Cut it Up - ATG
__________________________________________
Challenge Recognition


Crafty Gals Corner Fancy Fold

Happy Wednesday!
It's time for this month's challenge at
 
The theme for this challenge is: 

~ Anything Goes w/optional twist being Fancy Fold ~

 Our sponsors for this challenge are: 
(listed in alphabetical order)


Prize ~ 2 Digital Images

* * * * * * * * * *

Prize ~ 3 Digital Images
 
*************************************************
LeAnn's World 101


My DT card is a Gate Fold style.
 I colored the image with Altenew Woodless Pencils and fussy cut.
A scalloped circle frame was die cut and adhered to the left
panel of the card front. The image was popped onto the frame with foam tape.
Patterned paper was added to the card front and inside the card.
I added a die cut sentiment inside the card.
 
Won't you join us for this month's challenge?
We'd love to see you there!


Saturday, June 8, 2024

Father's Day Card

Happy Saturday!
This week's Polkadoodles Craft Challenge is up and running!

Challenge theme:
ANYTHING GOES

This week's DT project is a Father's Day card created with the
I went really simple with this card, just stamping some 
of the words and the sentiment with different colors of ink.
Thin strips of blue cardstock to match my card base were added.
The patterned paper on the left side is from


Won't you join us?
We'd love to see you there!


Thursday, June 6, 2024

Birthday Cupcake Card

Hi there!
Sharing a birthday card created as my 1st DT project this month for


The cupcake was stamped, colored with pencils and die cut.
I popped it with foam tape onto the circle die cut which 
was matted with another circle die cut.
I stamped the flowers with one of the stamps in the Valentine Cupcake Stamps Set
 on the upper part of the card base.
The patterned paper on the lower portion of the card is from my stash.
I made the bow with a punch board.
The sentiment was die cut.

We would love for you to connect with us in the

You can find more Pajama Crafter Stamps inspiration from 
other design team members and are welcome to post your creations
 using Pajama Crafter Stamps products.

Also follow on Instagram @pajamacrafterstamps.
_______________________________________________
Linking up to:
A Place to Start - playing ATG
Dream Valley Challenges - Favorite Colors(purples)
613 Avenue Create - ATG option

_________________________________________________
Challenge Recognition


Saturday, June 1, 2024

June at Morgan's ArtWorld

Happy Saturday!
And, it's June 1st, so that means a new challenge is up at


The challenge theme is always
ANYTHING GOES.
You can enter projects using any images from any company.

My DT card was created with


The image is colored with Prismacolor Pencils and fussy cut.
She is framed with oval disc cuts.
My background consists of white card stock embossed 
with an embossing folder and inked to bring out the raised portions.
I fussy cut the flowers from a scrap piece of patterned paper in my stash.
The sentiment was die cut.

I hope you join us this month!

********************************************
To purchase Morgan's Artworld Images, please visit our  Shop Links

Come along and join Morgan's Artworld Facebook Group.

You can join Facebook Group on this Link HERE! 


****************************************************
 Linking up to:
Try it on Tuesday - Emboss It
Pearly Sparkles Challenge - One for the Girls