Thursday, January 30, 2025
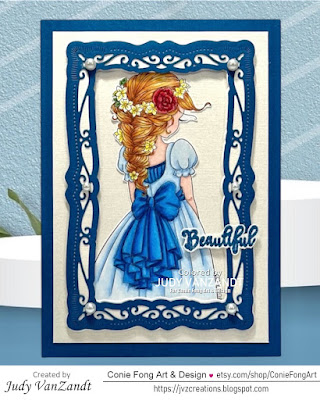
Beautiful Braids in My Hair
Tuesday, January 28, 2025
My Cup of Tea Printer Tray
Hi there!
I'm happy to share a home decor project created for Clear Scraps.
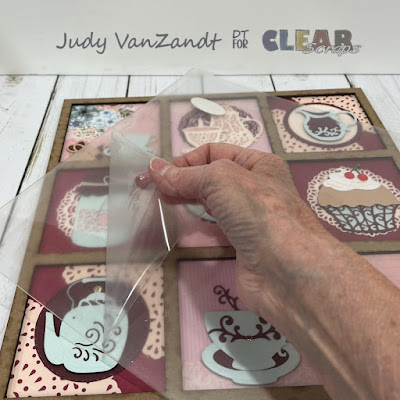
This is a tea themed printer tray using the Square Printer Tray and the new Mini Shaker Teapot.
I started this project by pulling out the 5 pieces of the printer tray.
2 of the chipboard cutout pieces were glued together.
I applied double sided tape to the edges of the chipboard back piece.
A piece of 12 x 12 inch card stock was adhered to the back.
Gold gilding wax was applied to the 3rd chipboard cutout piece and set aside.
I pulled out a coordinating paper pad and an assortment of dies from Crafter’s Companion to use for decorating the tray.
Die cutting was done.
Patterned papers were cut to 4 x 4 inches for some of the squares of the tray.
I started adding the patterned papers.
The die cuts were added to each section of the tray.
The protective film was removed from the acrylic divider.
The acrylic divider and top chipboard cutout piece were adhered to the tray.
The last part of the project is to put the shaker together.
I started by painting the chipboard pieces with acrylic paint.
Adhere 2 of the 3 chipboard forms together.
This piece is then adhered to the chipboard back.
Next, add shaker pieces.
Remove protective film from both sides of the acrylic piece.
Adhere the acrylic to the chipboard filled with shaker pieces.
Add the top chipboard piece to the acrylic.
I added some gold gilding wax to the teapot.
The teapot was added to the lower right fray front to finish.
I love the way this “My Cup of Tea” Printer Tray project came out and hope you do too!
Be sure and check out more Clear Scraps inspiration
by following on social media
************************************
Linking up to:
A Cut Above - ATG w/a die cut
Dream Valley Challenge - Use Pink or Red
A Place to Start - playing ATG
613 Avenue Create - playing ATG
Classic Design Challenge - ATG option
Crafts Galore Encore Challenge - ATG
Die Cut Divas - New (Teapot Shaker & Printer Tray)
The Creative Crafters - ATG
Pearly Sparkles Challenge - Something Old, Something New
(Old dies and DP, new printers tray & teapot shaker)
___________________________________________
Challenge Recognition
Saturday, January 25, 2025
Baby Seal Valentine
Friday, January 24, 2025
Love Birds Treat Holders
1 x $50 RANDOM PRIZE from all entries: $50 voucher to the Polkadoodles Store to spend on anything.
3 x $10 PRIZE from all entries - we will pick our favourite Top 3 entries to win a $10 voucher to the Polkadoodles Store to spend on anything.
Thursday, January 23, 2025
Birthday Cake Card
Wednesday, January 22, 2025
Valentine Shadow Box
Creating a Base
A 12 x 12 inch piece of Cougar White Card Stock will serve as the base.
I also am using DCS Discount Card Stock: Pastel Pink Card Stock, DCS Discount Card Stock: Pearlized Textured Fruit Punch Pink, DCS Discount Card Stock: Amaranth Pink and Basis Burgundy Card Stock.
Heart Pieces
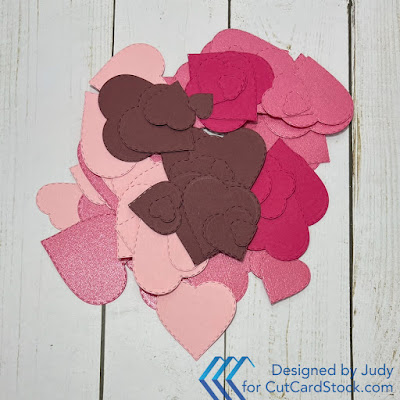
Cut various sizes of hearts out of the pink and burgundy card stocks. I cut mine with dies in four sizes. You can hand cut, use dies or cut files for them.
Start adding the hearts to the base inside the center of the heart tracing with your preferred adhesive. I am using a low temp glue gun and running the glue down the fold on the backside of the hearts.
Finishing
All that’s left is to add the project to a shadow box.
Thanks for taking a look at my Valentine Shadow Box project. I am so happy with it and even though I call it a Valentine project, it is a great home decor project to display year round.
Join us over on the CutCardStock Facebook Page and the newly revamped Facebook Group Creating with CutCardStock for more inspiration.
And even more inspiration can be found on the CutCardStock Creative Blog.


.jpeg)


