Thursday, December 26, 2024

Missing You

Happy day after  Christmas!
I hope everyone is well and enjoyed 
time with family and/or friends yesterday.
My day was great!

Today I'm sharing a DT make for
We have been creating cards based on sketches all this month.

I used My Best Friend Stamps for this week's card.


I colored this sweet little Yorkshire Terrier with Prismacolor Pencils and fussy cut.
My card base was die cut. 3 layers of circle die cuts were placed behind the dog and
 2 more circle die cuts were added off to the side.
I used 2 dies from Prickley Pear,
The sentiment was stamped and is included in the stamp set.

Sketch used is below.


Thanks for stopping by and enjoy the rest of your holiday!

************************************
Linking up to:
Die Cut Divas - Fancy/Uneven Edges
A Place to Start - playing ATG
613 Avenue Create - playing ATG

__________________________________________
Challenge Recognition


Tuesday, December 24, 2024

Large Christmas Tags


Hello there! 

I'm here sharing a new project for  Clear Scraps project for the month of December!


I am sharing my process of decorating the 4 tags that 

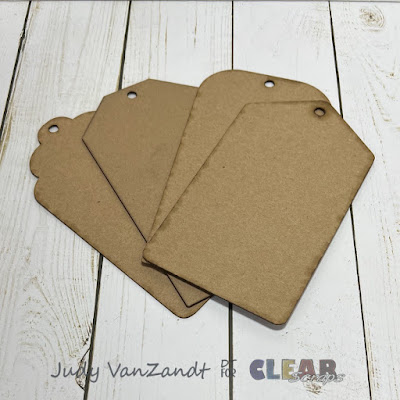
are included in the Chipboard Tag Album

Each tag is a different shape and measures approximately 3.75 x 6.75 inches.


Rather than putting an album together I am choosing to use these tags separately as toppers for cards, to decorate a gift box or add to a gift bag. You could even send them as cards by writing or stamping a sentiment to the backside! 


For these tags, I am using papers and die cuts from HunkyDory Adorable Scoreable Sheets that I have had in my stash for quite a while. 


I pulled out the papers and pieces for each tag. 


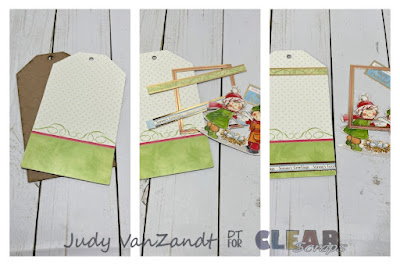
My 1st step for each is to trace the tags onto the back of my chosen patterned papers as seen in the photo below.


Cut each tracing.


Adhere the traced papers to the front of the tags and start adding the die cuts and other components chosen. Some of the pieces used are layered, some were fussy cut.


Here’s what I have thus far.


To finish each tag I added ribbons.


I hope you’ve enjoyed taking a look at my project!


Be sure and check out more Clear Scraps inspiration 

by following on social media


Clear Scraps Blog

Clear Scraps Facebook

Clear Scraps Instagram

Clear Scraps Pinterest  


Friday, December 20, 2024

Frosty Winter Themed Card


Hey there!Today I'm sharing my latest project for CutCardStock. This is a winter theme card using card stock, stamps and dies that lend to a “frosty” feel.


Focal

I start my project by stamping an Angiegirl image I have in my stash onto a piece of Cougar White Smooth Card Stock. This will be the focal for the card.

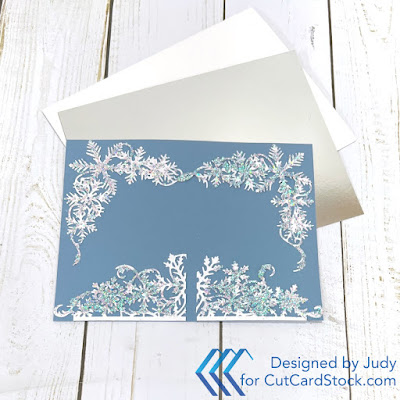
Cut two pieces of card stock to cover the card base. A piece of Bright Foil Silver Card Stock measures 5 x 6 1/2 inches. Lessebo Colors Premium MISTY BLUE 83lb Cardstock is cut to 4 3/4 x 6 1/4 inches.


Color the image using Prismacolor Pencils and die cut with an oval die. Die cutting a piece of the Bright Foil Silver Card Stock with an oval die will create a frame for the image.


A frosty winter theme card needs snowflakes. 

Die cutting 2 snowflake corners, 2 snowflakes and a snowflake border will give that feel. Cut these with Stardream Metallic CRYSTAL (white) 105 lb Card Stock.


I am adding glitter to the snowflake corners and border.

Adhere the corners and the border to the Lessebo Misty Blue Card Stock piece. Cutting the border in half will expand it to fit across the width of the card.

Card Base

Layer the Lessebo Misty Blue piece onto the Bright Foil Silver piece from above. Add this onto the 5 x 6 1/2 inch card base which is out of Cougar White Smooth Card Stock.


The oval piece goes on.

Add the 2 individual snowflakes to the snowflake corners with foam squares.

We will add a sentiment to complete the card. Stamp the sentiment with VersaMark ink and heat emboss.

Fussy cut he sentiment and adhere to the card.

I add some gems to the corner die cuts.

Stamp and heat emboss a snowflake on the lower left corner of the envelope just to add little bit more!

Thanks for taking a look at my winter theme card.

Join us over on the CutCardStock Facebook Page and the newly revamped Facebook Group Creating with CutCardStock for more inspiration.

And even more inspiration can be found on the CutCardStock Blog.

******************************************
Linking up to:
My Time to Craft - Something Snow-Related
A Place to Start - playing ATG
613 Avenue Create - ATG/any winter holiday twist

____________________________________________
Challenge Recognition


Thursday, December 19, 2024

Sliding By to Say Hi

Hello there!
Sharing a little inspiration today for

Those of us on the design team are using sketches this month and sharing them as well.
If you don't use sketches give them a try.
I find if I am"stumped" when creating that sketches help.
And you don't have to use them exactly as they are.
Put your own spin on them!

My card was created with 


This is the sketch my card design is based on.

As you can see, I varied it slightly and that's okay!

I stamped and colored the penguin and tree images with pencils before die cutting.
A pattern paper is used on the top portion of the card.
I created snow banks with white card stock which was hand cut and inked.
The sentiment from the bundle was stamped and 3 pearls added.

Give sketches a try!
You'll like them!

**********************************
Linking up to:
Critter Crazy Challenge - ATG w/featured critter
Creative Knockouts - Snow Much Fun
A Place to Start - playing ATG
613 Avenue Create - playing ATG

____________________________________