Saturday, November 30, 2024
Have the Best Christmas
Sunday, November 24, 2024
Christmas Ornaments Card
Hey there! It’s Judy here with a Christmas Ornaments Card project created for CutCardStock.
Christmas cards are definitely favorites of mine to make. And, I love the way this one came out and just had to share!
Materials
I am using a variety of card stocks Also, a 3D embossing folder, several ornament, pine and berry dies, ribbon, adhesive and foam tape.
Cougar NATURAL 80 lb. cardstock Stardream Metallic OPAL (cream) 105 lb Card Stock Gold Bright FOIL 10 pt Cardstock DCS Red GLITTER Heavyweight 12×12 Discount Card Stock DCS Green GLITTER Heavyweight 12×12 Discount Card Stock Pop Tone WILD CHERRY 8.5×11 Discount Card Stock Pop Tone GUM DROP GREEN 8.5×11 Discount Card Stock Lessebo Colors HUNTER GREEN 83lb Cardstock
Card Base
My card base measures 5 x 6 1/2 inches and is the Cougar NATURAL 80 lb. cardstock . Cut a piece of the Gold Bright FOIL 10 pt Cardstock to the same size, 5 x 6 1/2 inches and a piece of Stardream Metallic OPAL (cream) 105 lb Card Stock.
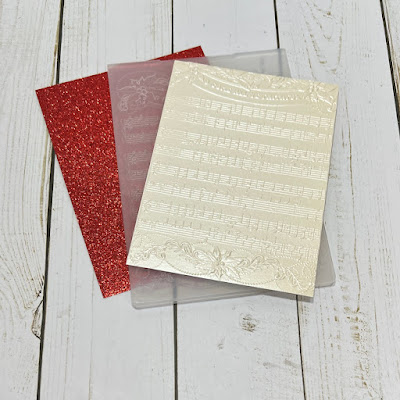
Next, emboss the Opal card stock and cut a piece of DCS Red GLITTER Heavyweight 12×12 Discount Card Stock.
Mat the opal card stock with the red glitter and the gold foil.
Cover the front of the card.
Die Cuts
I die cut a variety of pine boughs out of the green card stocks and some berry sprays out of the wild cherry card stock.
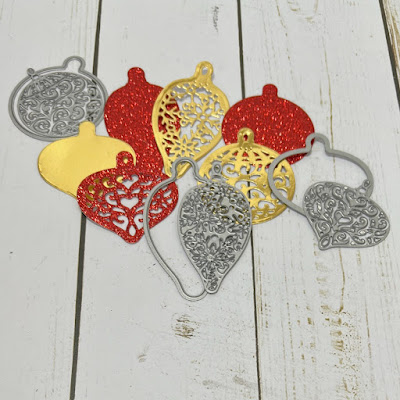
Die cut using the gold foil and red glitter card stock.
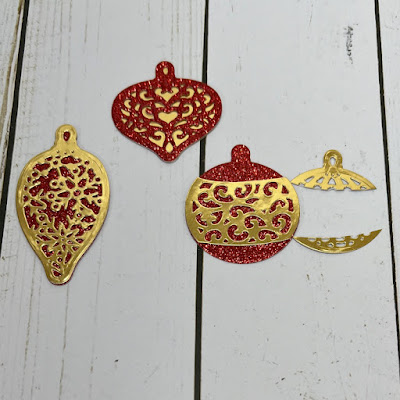
Layer the ornament die cuts to make 3.
Add the pine sprays in layers.
It’s time to add the ornament die cuts.
I cut some 1/8 inch wide ribbon for bows and lengths to “hang” the ornaments.
Adhere the bows to the ornaments. Die cut a sentiment.
Adhere the ornaments to the card front with foam tape. Add the ribbon behind the ornaments and up to the top pf the card through the pine boughs. The sentiment is the last piece to add.
Thanks for taking a look at my Christmas Ornaments Card project!
Join us over on the CutCardStock Facebook Page and the newly revamped Facebook Group Creating with CutCardStock for more inspiration.
And even more inspiration can be found on the CutCardStock Blog.
----------------------------------------------------------------
Saturday, November 23, 2024
Quick Phone Stand Project
I am using the Vintage Acrylic Phone Stand. This stand comes with 2 acrylic pieces that interlock with each other. It measures approximately 4 x 8 inches when assembled and fits most cell phones.
This phone stand can be decorated in a variety of ways including paint, paper and inks. I decided to use paper for this project.
I chose 2 coordinating patterned papers, a stripe and a floral.
The larger piece was traced onto the back of the striped paper.
I cut around the tracing.
To adhere the paper to the acrylic I used an adhesive sheet. I placed the patterned paper backside down on the adhesive and trimmed.
I pulled the protective film off of both sides of the acrylic piece.
The striped paper was adhered to the front.
The coordinating floral paper was cut down to add over the striped paper. I also am using a cut apart and 2 border pieces.
I fussy cut the flowers on the cut apart.
The floral piece was adhered.
The fussy cut flowers were glued to the top and borders added.
The smaller acrylic piece is inserted into the slot on the larger piece after removing the protective film.
I added a bow to finish.
All done! Quick and easy!
Thanks for checking out my project!
You can find more Clear Scraps inspiration
by following on social media
Winter Birthday Card
Friday, November 22, 2024
Woodland Winter InstaHop
Get ready for some holiday magic! We’re excited to reveal our Woodland Winter Inspiration Hop at Pajama Crafter Stamps! This month we’re bringing you enchanting new products inspired by cozy forests, snowy nights, and all the charm of winter wildlife.
Join us on the hop to see all the creative ways you can bring these new products to life - and maybe find a surprise or two!
GIVEAWAY:
1. Leave a comment and a like at each hop stop for a chance to win one $20 store voucher from Pajama Crafter Stamps! Vouchers must be used by December 30, 2024.
2. Follow me and @pajamacrafterstamps.
3. A winner will be chosen randomly from all comments left by November 26 at 11:59PM EST. The winner will be announced on the Pajama Crafter Stamps Instagram and Facebook on November 27.
This hop is in no way sponsored, administered, or associated with Instagram or Facebook. By entering, entrants confirm they are 13+ years of age, release Instagram and Facebook of responsibility, and agree to their terms of use.
Thanks for hopping with us today!
My card was created with the new
My background consists of blue card stock for a sky and
white card stock, which I handout and pieced together to form snow banks.
I added a little inking.
One of the sentiments from the set was stamped, fussy cut and added.
The trees were die cut with the Tree 2 Die from Prickley Pear.
I added a few Girls Best Friend Rhinestones for embellishment.
______________________________________________
Be sure and follow the Hop order below on Instagram and comment
at each stop for a chance to win a $20 voucher.
Hop order:
@pajamacrafterstamps
@joywilsonink
@createdjust4udesigns
@sglass1908
@sejrandersen
@stamparuecreations
@stationarybyjustine
@bowdangel
@beckyharrisoncards
@copic_diva
@743linda
@joy_in_a_jar
#pajamacrafterstamps #cardmakersofinstagram
#woodlandwinter
________________________________________________
Linking up to:
Crafty Animals - ATG/w animal
Crafts Galore Encore Challenge - ATG
The Creative Crafters - ATG
A Perfect Time to Craft Open Challenge - ATG
Ally's Angels - ATG


