Monday, July 31, 2023
Clumsy Wanda
Thursday, July 27, 2023
Fabulous as You
- 6 Design
- 1 goup image and 5 Girls As Separate Images
- 18 Digital Stamps
- 7 Colouring Pages
- JPG & PNG formats
- 300 dpi
I have used the Scary Mel image.
Saturday, July 22, 2023
Molly's Winter Friends
Polkadoodles Christmas in July

Friday, July 21, 2023
Fence Card
Card Stock
DCS Discount Card Stock – Calico Blue (on special this month)
DCS Shimmery Textured Wedding Cake White Card Stock (on special this month)
Cougar White Smooth CardStock (on special this month)
Pop Tone Gum Drop Green Card Stock
Card Base
Create the card base by cutting a piece of blue card stock to 4 1/4 x 8 inches. Score at 5 1/2 inches along 8 inch side.
Construct the Fence
Place a piece of tape, washi tape or sticky note on the center, backside of the larger white piece straight down. This will help position the 4 fence railings. You’ll want the length of the top of the larger piece down to the bottom of the bottom railing to measure somewhere between 5 1/4 to 5 1/2 inches. I used a grid to help. Line the edges of the railings up with the outer edges of the top piece. I spaced each railing about a 1/4 inch apart. The other 2 3 3/4 inch pieces are lined up and glued just inside the outer edges to act as pence posts. My measurements are probably different than other tutorials you see, as I wanted a blue edge around my card.
I adhered this piece to the card base.
Embellishments
Die cutting was done using the Cougar White and Gum Drop card stock.
I added a little color to the white die cuts and also die cut a sentiment from the calico blue card stock.
Finishing
The greenery was added to the card base.
Sentiment and the bee were added to complete.
As always, we would love for you to connect with us over on the CutCardStock Facebook Page and the Facebook Group Creating with Card Stock for more inspiration.
Thursday, July 20, 2023
CRAFT Challenge Guest Designer
The sponsor for this challenge is
And the prize for this challenge is …
3 images from the store
___________________________________
Saturday, July 15, 2023
Magician Wanda
Thursday, July 13, 2023
Posh Victoria
- 6 Design
- 1 goup image and 5 Girls As Separate Images
- 18 Digital Stamps
- 7 Colouring Pages
- JPG & PNG formats
- 300 dpi
Wednesday, July 12, 2023
Crafty Gals Corner Christmas in July
Sunday, July 9, 2023
Merry & Bright
Saturday, July 8, 2023
Just Because Card
Friday, July 7, 2023
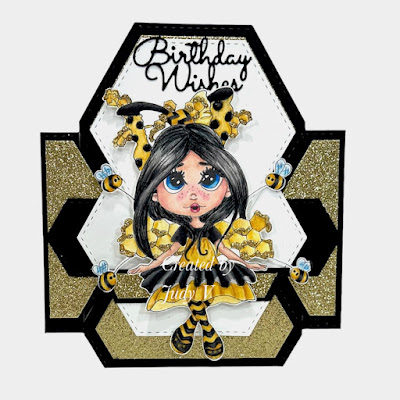
Birthday Wanda
I colored Wanda with pencils and fussy cut before adding
Thursday, July 6, 2023
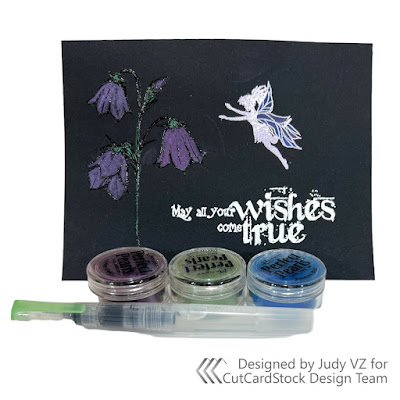
Stamping, Embossing and Perfect Pearls
Do you have supplies you’ve had for a while but have yet to use? Hey there, today I’m sharing a card project created for CutCardStock. And, I must confess, I used some supplies I’ve had for quite a while and have not used until now, Perfect Pearls.
There are many ways to use Perfect Pearls and I chose to use them as a watercolor on a black background. The shimmer created with this medium is really pretty.
Materials
DCS Discount Card Stock: Black Card Stock
3 clear stamp sets from Crafter’s Companion: “Enchanted Forest Fairy Wishes”, “Fairy Door’ and “Sparkle Garden”
Versamark Watermark Ink
3 Embossing Powders: White and clear from Crafter’s Companion and Lilac Pastel from Stampendous
Perfect Pearls: Forever Green, Forever Violet and Forever Blue
Stamping and Embossing
I started by trimming a piece of black card stock to 4 1/2 x 6 inches.
The sentiment was stamped with Versamark and embossed with white embossing powder.
A flower image was stamped and embossed with clear embossing powder and I stamped a fairy and embossed with lilac embossing powder.
The flowers and fairy wings were colored with Perfect Pearls using a water brush to apply.
Perfect Pearls
The flowers and fairy wings were colored with Perfect Pearls using a water brush to apply.Assembling the Card
A 5 x 6 1/2 inch card base with top fold was created by trimming a piece of black card stock to 10 x 6 1/2 inches, scoring at 5 inches along the 10 inch side and folding in half.
I cut a piece of white card stock to 4 7/8 x 6 3/8 inches. The stamped, embossed and colored piece was trimmed to 4 1/2 x 6 inches. both these pieces were centered and adhered onto the black card base.
I hope you have enjoyed my project and provided a little inspiration!
As always, we would love for you to connect with us over on the CutCardStock Facebook Page and the Facebook Group Creating with Card Stock for more inspiration.


wm.jpg)

.jpg)


