Title 2: Mummy
Title 3: Vampire Boy
Title 4: Witch Mummy Vampire Boy
Title 5: Ghost With Balloon
Title 6: Ghost With Gift Bag
Title 7: Ghost With Pumpkin
Title 8: Ghost With Hat
Title 9: Ghost With Bow Tie
Oh, how I love vintage photos! How about you?
They are perfect for creating a special layout project.
Hey there! Today I'm sharing my latest project for CutCardStock.
Solid Card Stock DCS Discount Card Stock: Canvas Textured Ginger Snap Card Stock Cougar WHITE 12 x 12 Medium to Heavyweight Discount Card Stock Bazzill Canvas Texture 8.5×11 Monochromatic Peach (Hopi) 80lb Cardstock Pop Tone HOT FUDGE 8.5×11 Discount Card StockPop Tone GUM DROP GREEN 8.5×11 Discount Card Stock
2 pieces of patterned card stock, flower, foliage and flourish dies, enamel dots, brown ink pad
Cut a piece of the 12 x 12 Cougar White Card Stock to 11 x 11 inches.
Ink this piece of card stock with brown ink for a vintage look.
The next step is to cut card stock to use to form the layout.
One of the pattern papers measures 7 1/2 x 7 inches and the other 4 1/2 x 7 inches. Also cut 2 pieces of the 1st pattern paper to 3/4 x 5 inches and 3/4 x 4 1/4 inches.
Cut 3 pieces of the Hot Fudge Card Stock. One measures 1 x 9 inches. The second measures 3 1/2 x 4 inches and the third should measure 3/4 x 5 1/2 inches.
I die cut a variety of sizes of flowers out of the Peach Card Stock. Cut out 2 different types of leaves from the Hot Fudge and Gum Drop Card Stock. The Ginger Snap Card Stock works well for for some flourishes.
Begin adding the die cut pieces in the lower right corner.
The layout title is one from my stash and goes under the photo.
Continue adding until you are happy with placement.
I appreciate you taking the time to check out my layout project.
Join us over on the CutCardStock Facebook Page and the newly revamped Facebook Group Creating with Card Stock for more inspiration.
And even more inspiration can be found on the CutCardStock Blog.
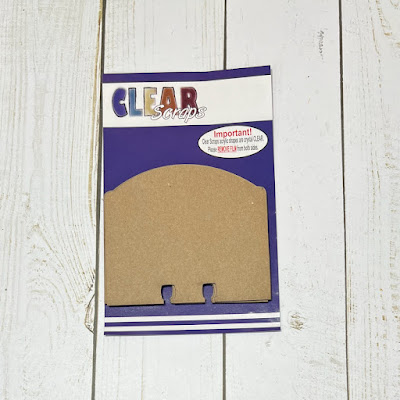
I am using a set of Rounded Chipboard Memory-Dex Dividers. These dividers work with most rolodex and other systems. Approximate size is 4.0"x3.5" and can be decorated in a variety of ways.
To start my project I went through my stash of Halloween materials and pulled out a Recollections Paper Pad and some stickers from Jolee’s Boutique.
Three papers were chosen from the paper pad which I am using to cover the dividers. To do this I traced the dividers on the backside of the papers and fussy cut.
The papers were adhered with glue.
I also fussy cut images that were printed on 2 of the papers I used. The image on the third is on the part of the paper I adhered to one of the dividers. A border was cut for one of the dividers out of a shiny metallic card stock.
All that’s left to do is add the cute ghost stickers to the cards.
Thanks so much for taking a look at my project!
You can find more Clear Scraps inspiration
by following on social media
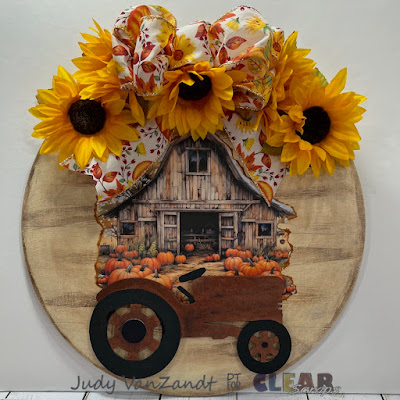
Hi there! Today I'm sharing a Fall Wall Decor project created for Clear Scraps!
I’ll be using the Large Circle Shiplap Shape and the Large Tractor Chipboard Embellishment.
To start I added an ivory acrylic paint to the shiplap shape with a brush and then rubbed some off with a dried baby wipe.
Next I added a burnt ochre paint sporadically and around the edge before rubbing with the wipe to give an aged effect.
The tractor is painted next with bronze and black acrylic paint. I added black circles cut out of card stock to the center of the wheels.
A digital barn image purchased on Etsy was printed.
I tore around the edges of the print and inked with a brown stamp pad.
Mod podge was applied to the back of the print.
The print was adhered to the shiplap shape. Mod podge was added over the front surface of the shiplap and dried with a heat gun.
Time to add the tractor. I added some pieces of cardboard to the backside for a little dimension, before adhering to the shiplap.
Ribbon and sunflowers were pulled out.
I made a 3 loop bow and added to the top of the shiplap circle.
5 sunflowers were added.
I wanted to add a little something more, so pulled out a Blessed Chipboard Word Title.
Color was add to the word title with an alcohol marker.
The project is complete.
I hope you like my project as much as I enjoyed putting it together.
You can find more Clear Scraps inspiration by following on social media
____________________________________________________