
I pulled out the Chipboard 5x7 Tab Album and Heart Mini Pallet Shape. The Album comes with 4 chipboard pages and 2 pre-drilled holes. Heart Mini Pallet measures approximately 3.75 x 3.75 inches, is made from 1/8 inch birch wood and is hand assembled. It can be used as a great addition to any craft project, is unfinished and ready to decorate as you please.
So, what should I do with these products? Well, I remembered I had purchased some digital Garden Fairy Clip Art on Etsy from ThursdayPrintsMY a while back and decided a little fairy themed album and/or journal would be a fun project to create!
I pulled out a 12x12 inch paper pad to use and chose 7 fairies, that I thought coordinated well with the patterned papers, and printed.
The fairy images were fussy cut.

Next I painted the 4 chipboard album pages and the heart with a light blue metallic acrylic paint. I’ll be covering the chipboard pages with paper so I only painted around the outside edges of both sides.
Cover each side of the chipboard album pages with the papers measuring 4 1/2x6 3/4 inches. I lined my papers up on the chipboard and marked where the holes are and punched. (later I ended up punching a total of 6 holes on each page with my Cinch machine)
The papers I used for the front and back covers are mostly white with some foiling, so I added a little ink for some color with a finger dauber.

.jpeg)
I decided to add some more pages to the album. Magical Garden Clip Art from CosmicMeta on Etsy was downloaded and printed on white card stock and trimmed to 4 1/2x6 3/4 inches.
Holes were punched.
.jpeg)
Wanting to add some pockets, I cut 6 pieces of patterned paper 4 1/2 inches wide and 3 1/2 inches long on one side and 1 3/4 inches long on the other in order to form a diagonal piece.These will be adhered to the bottom and outside edges of the pages.
.jpeg)
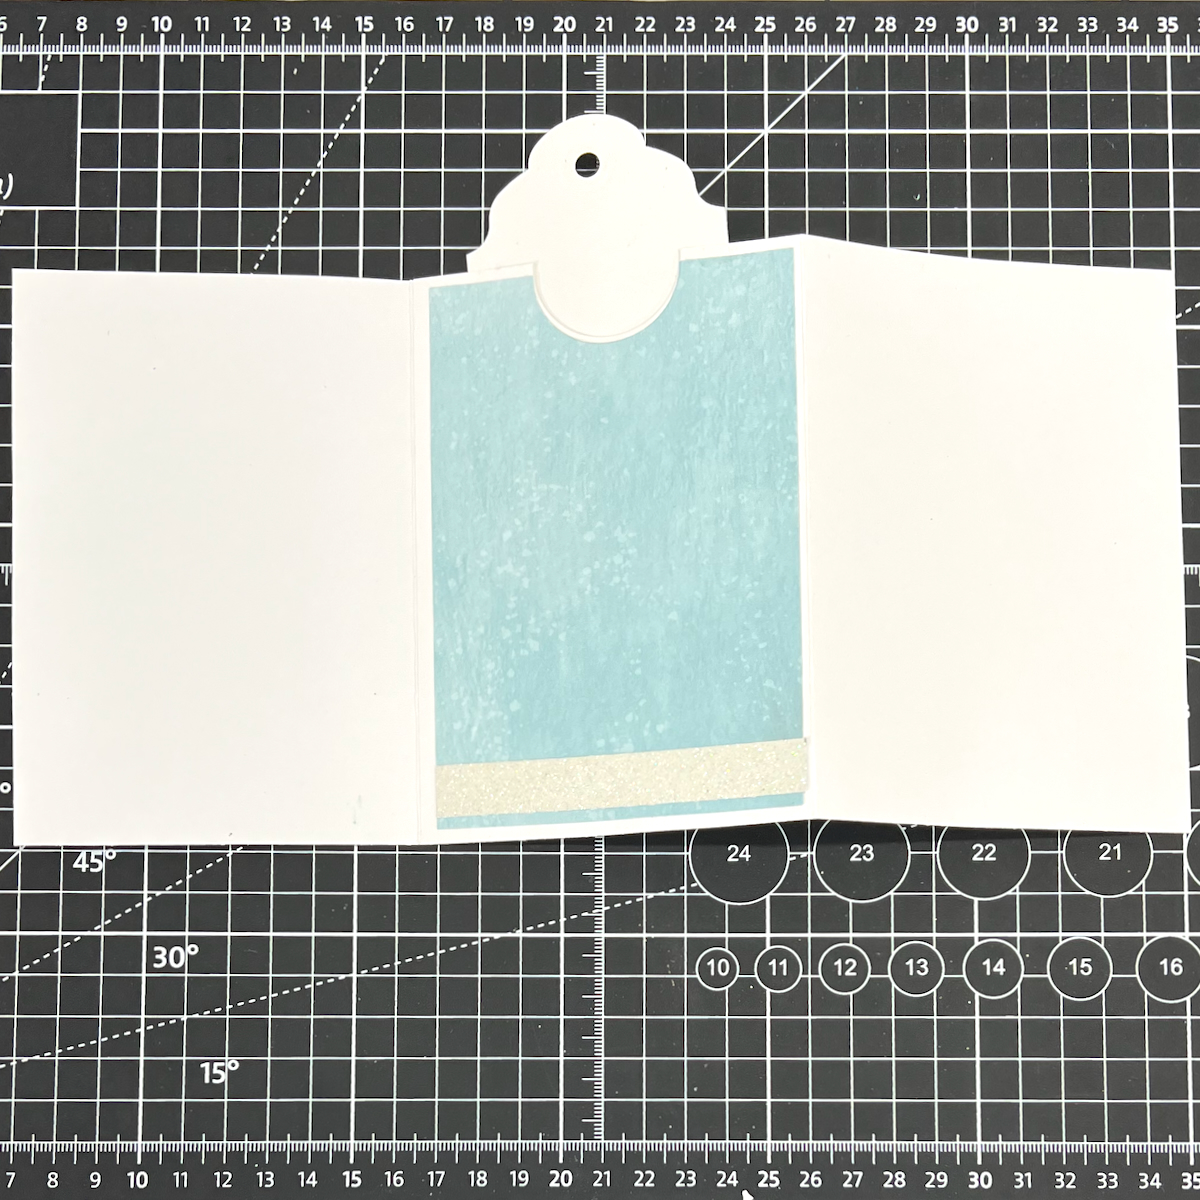
I also decided to add some trifold pieces to the inside front and back covers.
These were formed with 2 pieces of white card stock cut to 7 1/2 x 5 1/2 inches. Score at
3 3/4 inches along the 7 1/2 inch side of both pieces. Adhere 1 side of each together along the sides and bottom, leaving the top open to form a pocket for a tag. Fold with a mountain fold on one side and valley fold on the other. I notched the center panel with a round die or you could use a circle punch. This makes it easy to insert and remove my tags which
measure 2 1/2 x 4 1/2 inches.
Decorate the chipboard pages and printed pages as desired.
I die cut frames and word titles and pulled out an array of stickers and bling. A little bit of foiling was done with transfers and I added some wavy borders on the plain pages with a glitter gel pen.


Binder rings are used to hold the album together. I added some ribbon and a charm.
Some journaling cards were inserted in the pockets.
Here are photos of the completed pages.


You can find more Clear Scraps inspiration
by following on social media

Wonderful mini album, such lovely details. Anesha
ReplyDeleteOutstanding!!! What an incredible project!!! Beautifully made and filled with delightful papers and images! Thanks for sharing the cover page fairy with Heart's Quest Fantasy!!! --Becca
ReplyDeleteso so SO pretty! Thanks for playing along at 613 Avenue Create.
ReplyDeleteWow Judy your mini album is absolutely stunning!!
ReplyDeleteGorgeous creation! Thanks for joining us at A Place To Start!
ReplyDelete