Tuesday, July 30, 2024
Candy Cane Dog
Fall Memory-Dex Dividers
Hi there! It’s Judy here with a quick and easy Clear Scraps project.
I recently posted a project for a fall themed
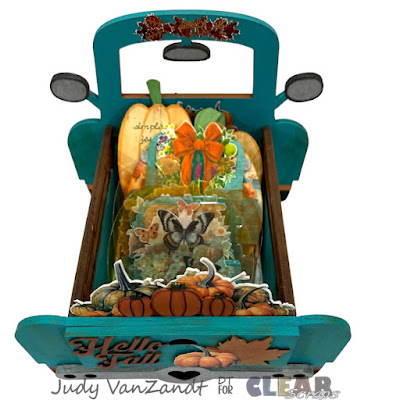
Vintage Truck Memeory-Dex Box.
Today I am sharing decorative fall themed dividers that
will go perfectly with it or they can be used in a rolodex.
A set of Harvest Chip Memory-Dex Dividers and
a set of Harvest Acrylic Memory-Dex Dividers were used.
For the Chipboard dividers I used a combination of metallic markers,
fall themed printable papers, clip art and stickers were used.
The truck divider was colored with metallic markers on both sides. I added a clip art wreath to the front side. A gold sticker sentiment was added.
I added printable papers and clip art to the front of the 2 pumpkins shaped dividers. The backside of each was colored with metallic markers. Gold sentiment stickers were added.
The Acrylic Memory-Dex Dividers were colored with alcohol markers. I added clip art printed on vellum to decorate.
Thanks for taking a look at today’s Memory-Dex Dividers project.
You can find more Clear Scraps inspiration
by following on social media
Thursday, July 25, 2024
Table Top Games
- 3 black and white line drawings
- 3 full colour images
- 5 word images / sentiments
Two Snow Ladies
Wednesday, July 24, 2024
Paperclip Embellishments & Folio
Are you looking for a good way to use all those card stock scraps you have piling up?
Hey there!Today I'm sharing my latest CutCardStock DT project. Maybe you’re not like me and have mounds of paper scraps. I just can’t seem to throw any away, because, I may just need them for something??? So I have put some to use by making these paperclip embellishments.
Use these in a multitude of ways. You can use them in planners or journals. Or, use them for a quick card project or on a scrapbook page! I put together 12 of them thinking each one could represent months of the year. And since CutCardStock has envelopes as July’s Monthly Specials, I also put together a folio made with 2 large envelopes to store them in.
Let’s start!
Paperclip Embellishments
Pull out a bunch of card stock scraps and paperclips that measure 2 inches.
I am using cardstock that includes: multiple colors of Lessbo Premium Discount Card Stock, DCS Discount Textured and Pearlized Textured Card Stock, Stardream Metallic Card Stock, Basis Card Stock, Bright Foil 10 pt Card Stock
Cut small tags to use as bases for these embellishments and die cuts for decorating the tags.
Photos below show steps taken to put together each of the paperclip embellishments.
Score at the top end of the tags to fold over the longest edge of the paperclips. Glue down on back of the tags.
Gather die cuts and/or other pieces to decorate.
Adhere
Now lets put together a simple little folio to hold our paperclip embellishments.
All you need is 2 envelopes, some card stock, ribbon and adhesive of choice.
I am using 2 Cougar Premium White 7.5 inch Square Envelopes.
With one envelope in the left hand and the other in the right, slip the flap of the one on the right into the opening the the one on the left. Adhere the flap of the left envelope to the front side of the right.
Score both envelopes 3 inches from the outside edges. Fold to the inside and burnish. Fold where the 2 envelopes come together. You have a folio.
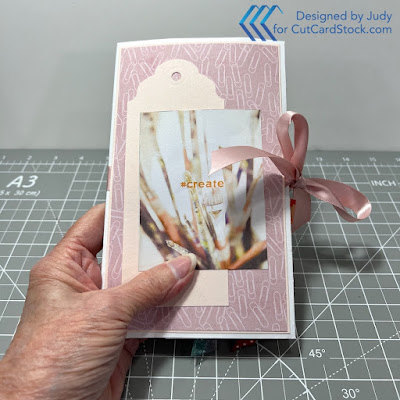
Cut card stock to cover the outside covers. I am using Basis Pink Card Stock to mat the patterned card stock and some cutouts for decorative pieces.
Center a piece of ribbon about 26 inches long around the front and back covers and adhere. Cover with the card stock and cut outs.
Cut 4 strips of card stock measuring 2 1/2 x 7 1/2 inches. Adhere these to the front and backside of the inside flaps. Attach only to the top and bottom edges, leaving the side open to slip the paperclips over.
Thank you for taking a look at my Paperclip Embellishments and Folio projects. I hope you like them as much as I enjoyed putting them together.
Join us over on the CutCardStock Facebook Page and the newly revamped Facebook Group Creating with CutCardStock for more inspiration.
Check out my YouTube Video and please subscribe.


.jpeg)


