
Oh, I’ve been wanting to make some of the Split Circle Cards I’ve seen on Pinterest! Have you seen these? Different sized, shaped die cuts are cut with different colors or patterned card stock. Layer and glue them together. Cut them in half and arrange in interesting configurations. Most of them I’ve seen are done with circle die cuts, but they can also be done with other shapes.
Hey there! It’s Judy VZ from Created Just 4 U here posting for CutCardStock. I’ll show you how I created 2 cards that were created with the same die cut shapes, but vary somewhat.

Card Stock
Cut CardStock is running a special on blue cards stock this month, so I went with 4 blue colors.
DCS Discount Card Stock: Textured Indigo Blue Card Stock
DCS Discount Card Stock: Blue Calico Discount Card Stock
Basis LIGHT BLUE 80lb Cardstock
I also threw in a little Stardream Metallic SILVER 105 lb Card Stock and used Mohawk Super Fine White Smooth 100 lb CardStock for my 5 x 6 1/2 inch card bases.
Die Cutting & Card Base
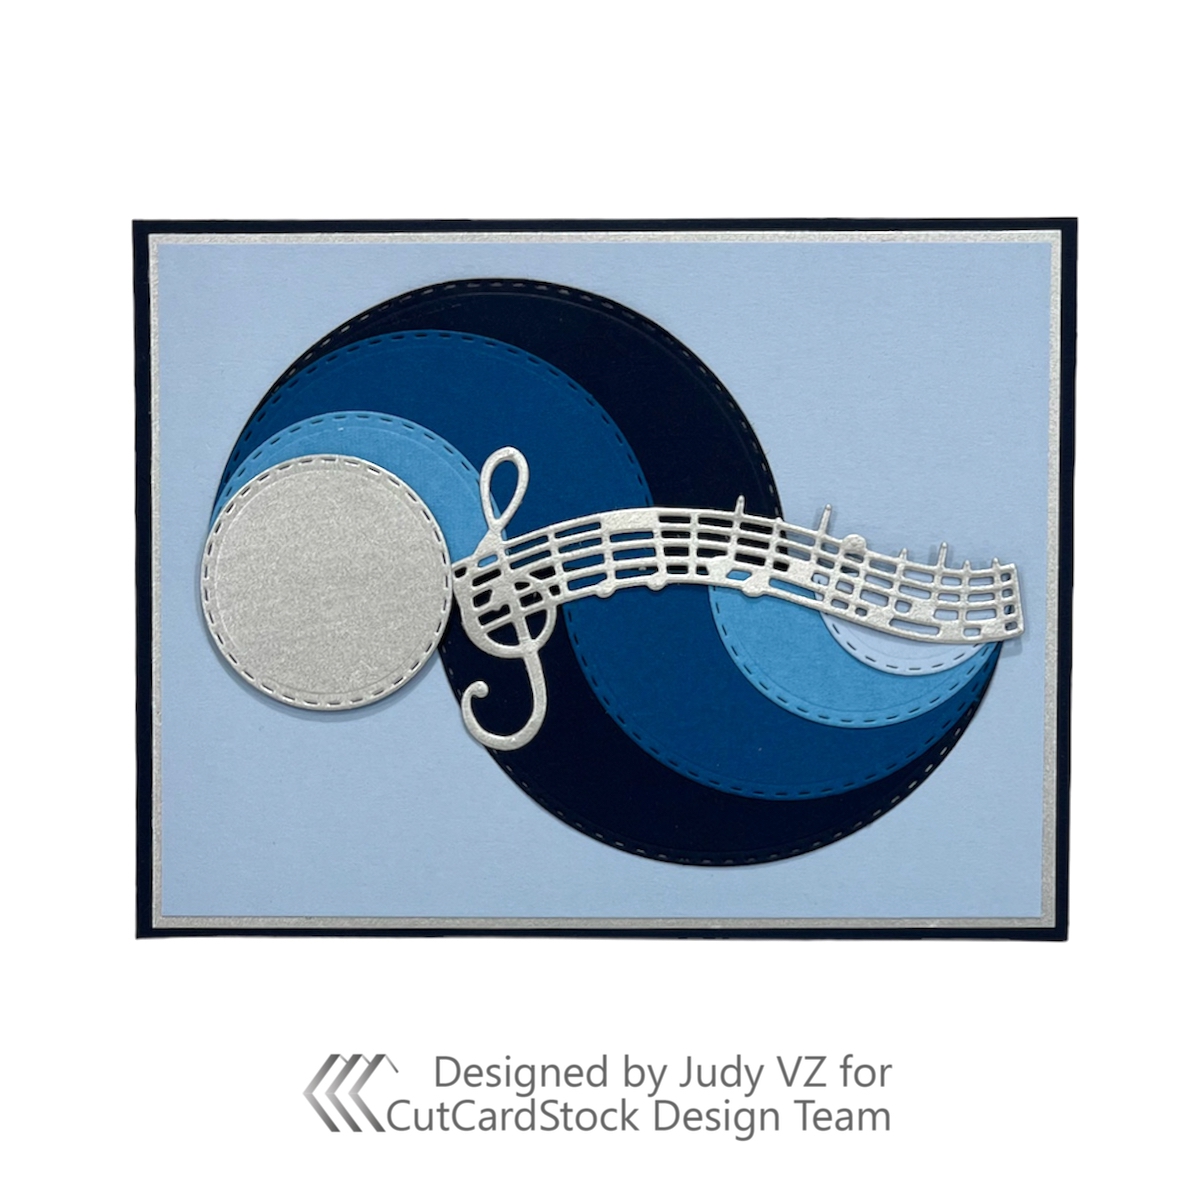
I die cut 4 different sized circles for each card using the blue colors.
.jpeg)
Mats were cut for the card base. A piece of navy was cut 5 x 6 1/2 inches, silver 4 3/4 x 6 1/4 and light blue was cut to 4 5/8 x 6 1/8 inches. The sentiment and music stave were cut out of navy and silver.

The mats were adhered to the card base.

Assemble Circles
Adhere the 4 die cut circles together, as seen in photo below and cut in half.

Design the Layout
Arrange the 2 shaped pieces and adhere to card base. I decided to add additional silver circle die cuts to each card as seen in the photos below. One is on top and one is behind. The music stave die cut covers where the 2 circle halves meet. You can add a strip of card stock, ribbon or anything else you come up with to hide.

Add the sentiment and or any other embellishments you want.


Thanks so much for giving my project a look. I hope I’ve inspired you to try one of these cards.
We would love for you to connect with us over on the CutCardStock Facebook Page and the Facebook Group Creating with Card Stock for more inspiration.
Linking up to:
Classic Design Challenge - ATG
Die Cut Divas - Never Before Used Stuff (new card stock)
A very creative design using the circles in shades of blue, fabulous! Thanks for sharing with us at Allsorts this week.
ReplyDeleteLorraine
What brilliantly effective designs. Must try this!! Thank you for supporting my January Blues theme at Allsorts this week. Sarah
ReplyDeleteVery interesting design!! Bravo! Thanks for joining us at Die Cut Divas this January.
ReplyDeleteSuch a clever idea and really effective.
ReplyDeleteThanks for joining us at the Cut It Up Challenge.
Helen x
DT
A generic C&P comment as unable to type much (MS flare up) to let you know I've seen your lovely entry at Allsorts challenge, thank you.
ReplyDeleteB x
What a fun technique. Thank you for joining our Cut it Up challenge.
ReplyDeleteHugs,
Larelyn (CIU owner)
I've never seen this design. You certainly put your design and style into creating this card. So glad you joined us at Die Cut Divas.
ReplyDelete