Tuesday, April 29, 2025
Birthday Peonies
Sunday, April 27, 2025
Serenity Fairy Kisses
Friday, April 25, 2025
Bee Kind Mason Jar Lid Covers
Clear Scraps carries a Mason Jar Lid Cover Kit that makes it easy create a one of a kind lid cover with interchangeable wood circles made from birch wood that can be painted, inked and/or embellished.
I have some empty jars around my house that these lids just happen to fit on perfectly and
thought it would be fun to create a cute container for holding some beads.
To decorate the interchangeable wood circles I am using the
Bee Happy Chipboard Punchout Embellishments.
Let’s start by assembling the lid cover.
Layer and glue 3 of the included rings together.
Next, add the piece with the hole in the middle.
Finish with the last ring and paint. I used a light blue acrylic paint.
Next I am decorating the 3 interchangeable wood circles.
I printed 3 digital papers.
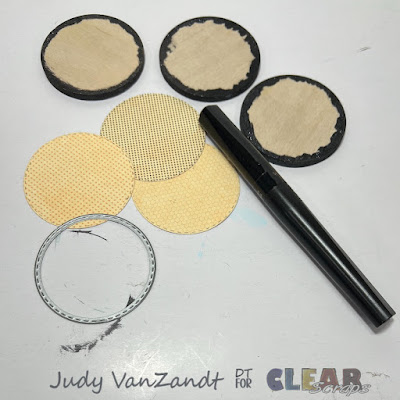
I die cut the papers with circle die and colored the edges of the wood circles with a black sparkle pen.
Add color the the chipboard pieces chosen. I used the black sparkle pen, red glitter gel pen and some gold paint.
The papers and chipboard pieces are adhered. I added some gem bees and flowers from my stash.
With the lids complete, I am embellishing my jar.
I adhered a digital paper to the center of the jar.
Lace and ribbon were added next.
To embellish, I pulled a die cut label from my stash and punched some flowers. I will add he rest of the gems used on the wood circles.
Here’s the finished jar.
Thanks for taking the time to check out my project! I loved putting it together.
Be sure and check out more Clear Scraps inspiration
by following on social media
Thursday, April 24, 2025
Ladybugs & Flowers
Ladybugs & flowers are the perfect combo for a fun spring card, don’t you think?
My card features the Where Hope Blooms Stamps.
This is such a fun stamp set.
It includes a cute puppy, kitten, bunnies, birds, ladybug and a flower. The set also includes some sentiments. So many possibilities for crafting.
Coloring these ladybugs and flowers with Prismacolor pencils is the next step.
Wanting to add some clouds, a hill and some grass,
I decide to add a few more flowers, so I stamp, color and fussy cut 4 more flowers and
Mat the panel with the stamping and stenciling with white card stock. Adhere to a green card base.
Stamp the sentiment on white card stock and die cut with a circle die to complete.
Thanks so much for checking out my Ladybugs & Flowers project.
I hope you’ll check out this fun stamp set and all the other products from Pajama Crafter Stamps.
For more Pajama Crafter Inspiration, be sure to visit the following places:
Instagram
Pajama Crafter Stamps and Friends Facebook
YouTube
Pinterest
Shop
Friday, April 18, 2025
It's Game Day
Who's Your Caddy Card
Thursday, April 17, 2025
Creating a Mother's Day Card
Creating a Mother’s Day Card is one of those projects that you want to make extra special!
After all who is more special than a mother?
When deciding to make a Mother’s Day Card I sorted through my die collection.
I fell upon a watering can stamp and die set.
Knowing I have quite a few flower dies I thought it would be fun to add flowers to the can.
What a great focal this will make!
Mother’s Day Card Focal
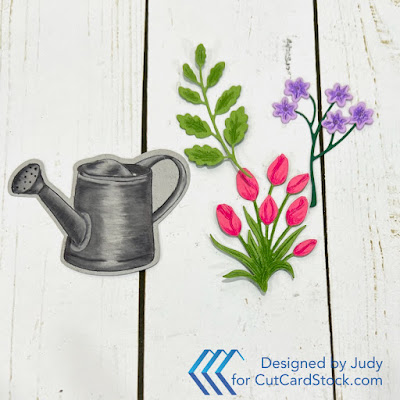
The first thing I did was stamp the watering can onto a piece of DCS Discount 8.5×11 Card Stock: Dolphin Gray Cardstock.
Secondly I die cut flowers and foliage to fill the can.
The tulips are cut twice to piece together.
Using Lessebo Colors Premium Bubble Gum Pink 83lb Discount Cardstock
Lessebo Colors Premium AMETHYST 83lb Discount Cardstock
Lessebo Colors HUNTER GREEN 83lb Cardstock
Pop Tone GUM DROP GREEN 8.5×11 Discount Card Stock
A little cutting on the top of the can to enable me to insert the flowers. A piece of tape on the backside of the can hold them in place.
With the completion of the watering can, I develop a plan for the rest of the card design.
Mother’s Day Card Design Plan
I’m thinking embossing would be great as a background and will ground my focal.
So, I flip through my embossing folders and decide on one that cuts and embosses.
Cougar White Smooth CardStock works great for embossing.
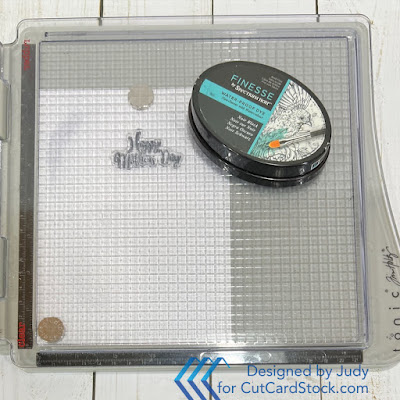
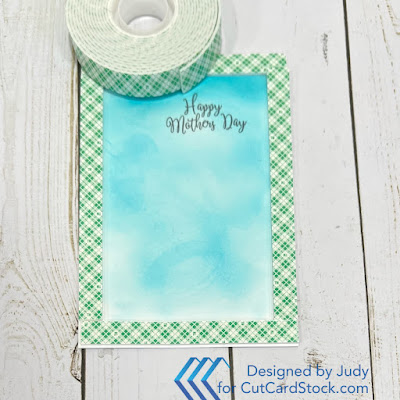
To add color to the sentiment panel I do some inking.
Add foam tape to all 4 edges.
Adhere to the sentiment piece.
Mother’s Day Card Base
Since my panel with the embossing measures 5 x 7 inches,
I am creating a 5 1/2 x 7 1/2 inch card base.
A piece of Cougar White Smooth CardStock is cut to 7 1/2 x 11 inches.
Score at 5 1/2 inches along the 11 inch side and fold.
I cut a piece of DCS Discount Card Stock: Hydrangea Purple 8.5×11 Discount Card Stock to
5 1/2 x 7 1/2 inches. This will cover the card front.
A piece of Pop Tone BLACK LICORICE 8.5×11 Discount Card Stock is cut to
5 1/8 x 7 1/8 inches. I will use this to mat the panel with the embossing.
Adhere the panel with embossing to the black mat.
Cover the white card base with the hydrangea purple card piece.
Finishing
Adhere the focal to the card with foam tape for some dimension.
Thank you for taking the time to check out my Creating a Mother’s Day Card project.
I love the results!
Join us over on the CutCardStock Facebook Page and the newly revamped Facebook Group Creating with CutCardStock for more inspiration.
And even more inspiration can be found on the CutCardStock Creative Blog.


.jpeg)


