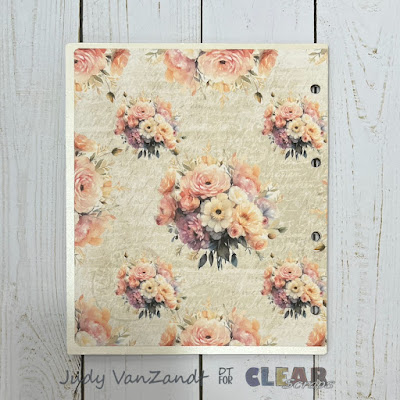
Starting with the first page, I removed the protective coverings and applied an adhesive sheet to the backside.
Wanting to add a little color I applied a sheet of very pale yellow vellum to the adhesive.
The vellum was trimmed with scissors and a craft knife.
A template of the heart was made and I cut a frame out of a white metallic card stock and adhered over the heart area.
I pulled out the pattern paper for the front of the album.
The lower left corner was fussy cut.
Then I chose a paper for the backside of the front page, traced the fussy cut piece for the front on a corner and fussy cut.
I adhered the corner pieces to the front and backside along the bottom and right side, leaving the middle open to form a pocket. Using the heart template a solid heart was cut and adhered to the upper left corner. A purple heart frame was cut and layered over the solid heart.
Some embellishments, die cut words were added.
I made 2 photo mats for the pocket on the backside.
Moving on to the front of the second page, I traced onto the backside of patterned paper.
Fussy cut and adhered.
I fussy cut a corner piece and adhered along the bottom and side edge and left the center open for a pocket.
A photo mat was put together to fit the pocket.
The backside of page 2 was traced onto a patterned paper, cut and adhered.
I created a triple fold piece for holding more photos. 2 pieces of card stock were scored in half. Adhering one edge of each piece together along the bottom and sides forms a pocket to hold tags for more photos or journaling. I did punch a half circle last the top of the front of the pocket.
A mat was added to the back the trifold piece and then adhered to the page.
For page 3, I removed the protective film. Patterned paper was cut and matted before adhering to each side.
For the front, I fussy cut a floral corner from another piece of patterned paper and adhered to the top right corner creating a pocket to tuck a photo. A photo mat was cut and added.
I created a pocket on the lower part of the back side. A fussy cut floral corner was added to the lower right corner. 3 photo mats were made to fit into the pocket.
The front of page 4 is covered with a solid color piece of card stock with a folded edge. I added a floral border to the left side.
2 photo mats were adhered to the left side with a little bling added.
I added a floral border to the opened right side creating a pocket to hold 2 more photo mats.
With the folded portion closed to the inside, I added another border to the right side creating another pocket. A photo mat was made to fit in the pocket.
The album is put together with book rings.
I added a few flowers to the front.
Thanks so much for checking out my Wedding Album project.
You can find more Clear Scraps inspiration by following on social media


Wow - this is a gorgeous album. So many different photo and journalling mats and tags all tucked and folded neatly into pockets and tuck spots in this lovely heart album. Great job!
ReplyDeleteThank you for sharing your project with us at the Crafts Galore Encore “Anything Goes” Challenge.
Good luck and we hope to see you again soon!
Carole at Craftilicious Creations
Spectacular project! Bet you had loads of fun creating this beauty! Such a pleasure having you join the Anything Goes challenge with Krafty Chicks this week.
ReplyDeleteDiane - DT KCC
Gorgeous! Thanks so much for sharing with us at A Place to Start!
ReplyDeleteHugz,
Chana Malkah, Owner
Such a fun design! Thank you for sharing this with us at 613 Avenue
ReplyDelete~Tamara